Why Do You Need a Remington 700 Scope?
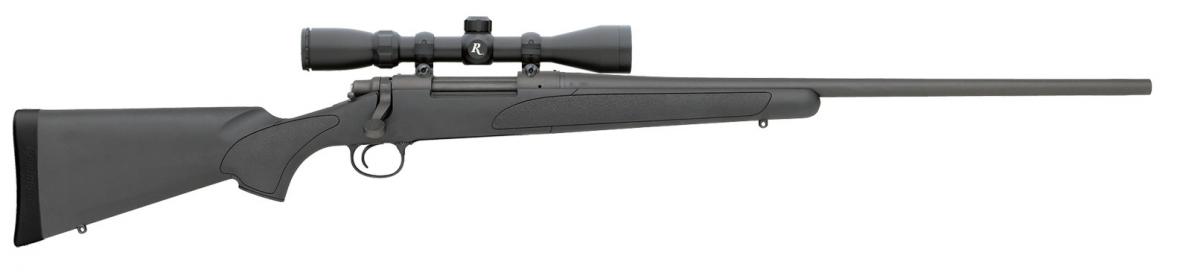
Mounting A Scope On A Remington 700 should not be hard after reading this guide. The Remington 700 rifles are specifically designed for precision shooting. The rifle comes with pre-drilled scope mount holes. That makes it easy to use the best scopes such as the Leupold VX-1 3-9x40mm.
The rifle’s scope mount holes are also filled with plug screws which prevent moisture getting in. That ensures rusting, corrosion, condensation, or general degradation does not occur.

The good thing with this rifle model is that it is compatible with almost all available scope mounts.
But mounting a scope wrongly in this kind of rifle, may make even the best scope to under-perform. Below is a breakdown on how you should mount a scope on the Remington 700 model.
Why Do You Need To Know How To Mount The Scope?
Knowing how to properly mount a scope is crucial to ensure accuracy, protect the scope, maintain consistent performance, and prolong its lifespan. Improper mounting can potentially damage the scope. It’s important to follow manufacturer instructions or seek guidance to ensure correct alignment, optimal eye relief, and secure attachment.
For more details, then check out the article How to Mount a Scope in 6 Easy Steps now
Mounting A Scope On A Remington 700 in Five Steps – Easy
Tools for Mounting a Scope on the Remington 700
1. Remington Accessories for mounting your scope.

CHECK LOWEST PRICE OF REMINGTON
2. Lone Star Precision Scope Bubble Level Indicator for Scope Leveling

CHECK LOWEST PRICE OF LONE STAR PRECISION
Step 1: Clean the mounting surface.
This is always the first thing to do before mounting a scope, remove any grease, dirt or residue that might interfere with scope mounting. Remove the plug screws also from the top of a receiver so as to have access of greasing each hole.
Step 2: Mount the scope base
Apply a small amount of gun oil on the contact surface where you want to attach the scope, this will help in discouraging the formation of dust in between the receiver and scope base.
Also, due to recoiling that happens during shooting, it is always advisable to add thread locker into the screw threads. This will prevent wiggling of screws that might occur over sometimes.
It is advisable also to use removable threadlocker. This is because the permanent threadlocker will require the service of a trained blacksmith to loosen it at a temperature of 500 degrees Fahrenheit.
Inspect the receiver after tightening the screw to ensure it does not protrude out and hit the bolt.
Step 3: Place the Remington Rings and Test Fitting on the Scope
After securely fastening the scope base, it’s now time for scope rings to be mounted. Ensure that you first disassemble and organize neatly the small screws and scope rings parts to avoid losing them.
Mounting the bottom of the ring first is the preferred way before you test fit and add the top rings to the scope.
When tightening the screws on the Picatinny base, make sure that the rings are pushed as forward as possible against the closest rail. This will help in keeping the rings fully fixed against the rail during recoil.
Continue by placing the scope into the scope ring bottom set and ensure that the scope ring is at a distance with the adjustment turrets and objective bell for any adjustments.
Eye relief needs to be set and that is why we don’t need to torque the screws down.
Step 4: Mounting A Scope On A Remington 700 – Setting the eye relief
Eye relief needs to be properly set so as to prevent the black halo witnessed sometimes when looking through the scope. Setting eye relief is done by picking up the rifle and shouldering it in a position as of you are using it.
Do this with eyes closed and then comfortably find a spot for your cheek to rest on the comb. This will naturally help determine the placement of your rifle.
Once you have comfortably shouldered your rifle, open your eyes so as to find the right eye relief. Adjust the scope by moving it forward and backward slightly so as to find the sweet spot.
This can be realized when you have a clear field of view when on the right distance, if you still can’t clearly see, then adjust the placement of scope rings.
Step 5: Leveling the scope On the Remington
For this step, you can use a Scope Bubble Level Indicator such as Lone Star Precision. This is done after you have successfully found the position of eye relief.
Ensure that the rifle is secured and place the level on the Centre turret, adjust the scope until the reticle became exactly parallel and perpendicular to the bore.
Leveled reticle will help in accurately compensating for windage and elevation. Having the scope fitted and leveled, all the scope rings and screws can now be tightened.
Make sure each screw is tightened up in a cross pattern way so as to make them appear equally seated on the rear and front of the scope
Mounting A Scope On A Remington 700
This is a classical model of rifle that is widely used for long range shooting and hunting. Find the correct scope and use the above procedure to get you started.
With some little practices at the range with this rifle, you will be amazed by wonders that it’s capable of doing. A good scope should be lightweight, easy to install and be able to work in sync on Remington 700 rifle.
i have two different scope mounts for the 700. the screw holes on the rifle are too small for either screws of the mounts.
are there special screws for these tiny holes?
and where can i get them?
thanks
shel lawrence